

Introduction
Welcome back to the final chapter of the Live Activities series!
Ready to jump back into Xcode and Swift? This edition promises to be a thrilling ride as you add interactivity and put the finishing touches on the Timer Live Activity you started in Part 2.
Remember the challenge I left you with at the end of our last session? It involved syncing the start time by passing arguments from JavaScript (JS) to Swift.
If you figured it out independently, fantastic! If not, no sweat. I'm here to guide you through the solution. Once that's out of the way, let's focus on completing the remaining features of our timer, prepping it for its grand debut.
Ready to roll? Let's get started!
Syncing
In any React Native app, the application state typically resides in React, often encapsulated within local state, context, or a blend of both. This setup is ideal for data that evolves over time and on which your views rely.
Take, for example, the elapsedTimeInMs state variable, representing the time elapsed since the timer commenced.
This variable is routinely updated every second by a scheduled interval.
However, it's crucial to grasp that application state isn't just about data directly fueling your views. Sometimes, you encounter data that doesn't feed directly into your views, yet is vital in depicting the state of your system.
Let's consider the timestamp marking when the timer starts. The moment you hit "Play", the app captures and stores this exact timestamp with a React ref.
Why a React ref, you ask? It essentially enables you to hold onto a value that remains unchanged throughout the component's lifecycle. It's akin to defining a variable outside the component, creating a closure over it. I opted for a ref here as it's a more conventional approach in such scenarios.
import React from 'react';
import {NativeModules} from 'react-native';
const {TimerWidgetModule} = NativeModules;
const useTimer = () => {
const [elapsedTimeInMs, setElapsedTimeInMs] = React.useState(0);
const startTime = React.useRef<number | null>(null); const intervalId = React.useRef<NodeJS.Timeout | null>(null);
function play() {
// Already playing, returning early
if (intervalId.current) {
return;
}
// First time playing, recording the start time
if (!startTime.current) {
startTime.current = Date.now();
}
TimerWidgetModule.startLiveActivity();
intervalId.current = setInterval(() => {
setElapsedTimeInMs(Date.now() - startTime.current!);
}, 1000);
}
// Rest of the hook goes below
};
export default useTimer;Async Nature of Native Modules
In the world of React Native, Native Modules operate on a different thread than your JavaScript thread. This separation means that the initiation of your Live Activity and your app timer may not align perfectly.
To bridge this gap, you can pass the start timestamp to the native module. This step allows you to measure the time taken for the bridge and inform Swift about any offset before the Live Activity timer kicks off, thereby enhancing the synchronicity between the two systems.
However, it's key to note that I use the term "enhancing" rather than "fixing." Why? Because several external factors impact the precision of both timers. These include different rendering or drawing time per system, and the distinct internal clocks dictating the timing of each tick.
In React, for instance, the app manually sets up an interval to calculate the elapsed time every 32 milliseconds.
Meanwhile, in the Live Activity, this responsibility is delegated to the operating system, utilizing the .timer style on a Date object.
It's a subtle yet important distinction in how each system handles time tracking.
Passing Arguments to the Native Module
To pass arguments from JavaScript to your native module effectively, follow these steps:
- Update your
TimerWidgetBridge.mbridge file to include a new argument for thestartLiveActivitymethod. - Utilize this argument in the
TimerWidgetModule.swiftfile and store it in a class property.
Let's dive into the first step.
// TimerWidgetBridge.m
#import <React/RCTBridgeModule.h>
@interface RCT_EXTERN_MODULE(TimerWidgetModule, NSObject)
+ (bool)requiresMainQueueSetup {
return NO;
}
RCT_EXTERN_METHOD(startLiveActivity:(nonnull double *)timestamp)RCT_EXTERN_METHOD(stopLiveActivity)
@endIn the realm of iOS development, the Date class from the Foundation framework typically deals with timestamps in seconds by default.
However, in the JavaScript (JS) universe, milliseconds are the more common unit of time measurement.
This discrepancy poses a challenge: how do we transfer time values between JS and native code without losing precision?
The solution is to opt for the double data type. Using double ensures that decimal values are accurately conveyed to the native side.
// TimerWidgetModule.swift
import Foundation
import ActivityKit
@objc(TimerWidgetModule)
class TimerWidgetModule: NSObject {
private var startedAt: Date?
private func areActivitiesEnabled() -> Bool {
return ActivityAuthorizationInfo().areActivitiesEnabled
}
@objc
func startLiveActivity(_ timestamp: Double) -> Void {
startedAt = Date(timeIntervalSince1970: timestamp) if (!areActivitiesEnabled()) {
// User disabled Live Activities for the app, nothing to do
return
}
// Preparing data for the Live Activity
let activityAttributes = TimerWidgetAttributes()
let contentState = TimerWidgetAttributes.ContentState(startedAt: startedAt) let activityContent = ActivityContent(state: contentState, staleDate: nil)
do {
// Request to start a new Live Activity with the content defined above
currentActivity = try Activity.request(attributes: activityAttributes, content: activityContent)
} catch {
// Handle errors, skipped for simplicity
}
}
@objc
func stopLiveActivity() -> Void {
startedAt = nil Task {
for activity in Activity<TimerWidgetAttributes>.activities {
await activity.end(nil, dismissalPolicy: .immediate)
}
}
}
}With the startLiveActivity method now upgraded, it can accept the timestamp as an argument.
This timestamp gets stored in the startedAt property. Later, this value is transferred to the Live Activity
as a dynamic attribute, ensuring that our timer stays in sync.
The stopLiveActivity method resets the startedAt property, hence preventing the timer from inadvertently
using outdated values the next time it's initiated.
Finally, the useTimer hook now dutifully passes the timestamp in seconds to the Native Module.
import React from 'react';
import {NativeModules} from 'react-native';
const {TimerWidgetModule} = NativeModules;
const useTimer = () => {
const [elapsedTimeInMs, setElapsedTimeInMs] = React.useState(0);
const startTime = React.useRef<number | null>(null);
const intervalId = React.useRef<NodeJS.Timeout | null>(null);
function play() {
// Already playing, returning early
if (intervalId.current) {
return;
}
// First time playing, recording the start time
if (!startTime.current) {
startTime.current = Date.now();
}
TimerWidgetModule.startLiveActivity(startTime.current / 1000);
intervalId.current = setInterval(() => {
setElapsedTimeInMs(Date.now() - startTime.current!);
}, 32);
}
// Rest of the hook goes below
};
export default useTimer;Now, it's time to put your work to the test. Fire up the simulator and see everything in action.
Want to cross-check your progress? You can compare your changes with my repository.
Just head over to the step/live_activity_sync_timer branch in the example project.
Implementing Pause/Resume
Up until now, our timer had two basic functions: start and stop. But let's elevate its functionality by adding a pause feature. This enhancement will allow users to temporarily halt the timer, both in the app and in the Live Activity.
I'll begin on the App side, focusing on tweaks to the useTimer hook. This hook is where the core logic of our timer resides.
In the following steps, I'll guide you through the necessary modifications to bring the pause capability to life.
Enhancing the useTimerhook
// useTimer.ts
import React from 'react';
import {NativeModules} from 'react-native';
const {TimerWidgetModule} = NativeModules;
const useTimer = () => {
const [elapsedTimeInMs, setElapsedTimeInMs] = React.useState(0);
const [isPlaying, setIsPlaying] = React.useState(false); const startTime = React.useRef<number | null>(null);
const pausedTime = React.useRef<number | null>(null);
const intervalId = React.useRef<NodeJS.Timeout | null>(null);
const elapsedTimeInSeconds = Math.floor(elapsedTimeInMs / 1000);
const secondUnits = elapsedTimeInSeconds % 10;
const secondTens = Math.floor(elapsedTimeInSeconds / 10) % 6;
const minutes = Math.floor(elapsedTimeInSeconds / 60);
const value = `${minutes}:${secondTens}${secondUnits}`;
function play() {
setIsPlaying(true);
// Already playing, returning early
if (intervalId.current) {
return;
}
// First time playing, recording the start time
if (!startTime.current) {
startTime.current = Date.now();
}
if (pausedTime.current) { // If the timer is paused, we need to update the start time const elapsedSincePaused = Date.now() - pausedTime.current; startTime.current = startTime.current! + elapsedSincePaused; pausedTime.current = null } else { TimerWidgetModule.startLiveActivity(startTime.current / 1000); }
intervalId.current = setInterval(() => {
setElapsedTimeInMs(Date.now() - startTime.current!);
}, 32);
}
function pause() { setIsPlaying(false); removeInterval(); if (startTime.current && !pausedTime.current) { pausedTime.current = Date.now(); setElapsedTimeInMs(pausedTime.current! - startTime.current!); } }
function reset() {
setIsPlaying(false); removeInterval();
startTime.current = null;
pausedTime.current = null; setElapsedTimeInMs(0);
TimerWidgetModule.stopLiveActivity();
}
function removeInterval() {
if (intervalId.current) {
clearInterval(intervalId.current);
intervalId.current = null;
}
}
return {
play,
pause, reset,
value,
isPlaying, };
};
export default useTimer;The useTimer hook now returns two new crucial elements:
- A
pausefunction: This can be linked directly to a button press, giving users the ability to pause the timer with a simple tap. - An
isPlayingboolean: This variable acts as a status indicator, revealing whether the timer is actively ticking or not.
With these new additions, the App component can now leverage these values to display the appropriate output. Here's how it looks in practice:
// App.tsx
import React from 'react';
import {Button, SafeAreaView, Text, View} from 'react-native';
import useTimer from './useTimer.ts';
function App(): React.JSX.Element {
const {value, reset, play, pause, isPlaying} = useTimer(); return (
<SafeAreaView
style={{flex: 1, justifyContent: 'center', alignItems: 'center'}}>
<View style={{paddingVertical: 32}}>
<Text style={{fontSize: 80, fontVariant: ['tabular-nums']}}>
{value}
</Text>
</View>
<View
style={{
flexDirection: 'row',
justifyContent: 'space-between',
paddingHorizontal: 48,
}}>
<View style={{marginRight: 32}}>
<Button
title={isPlaying ? 'Pause' : 'Play'} onPress={isPlaying ? pause : play} />
</View>
<Button title="Stop" onPress={reset} />
</View>
</SafeAreaView>
);
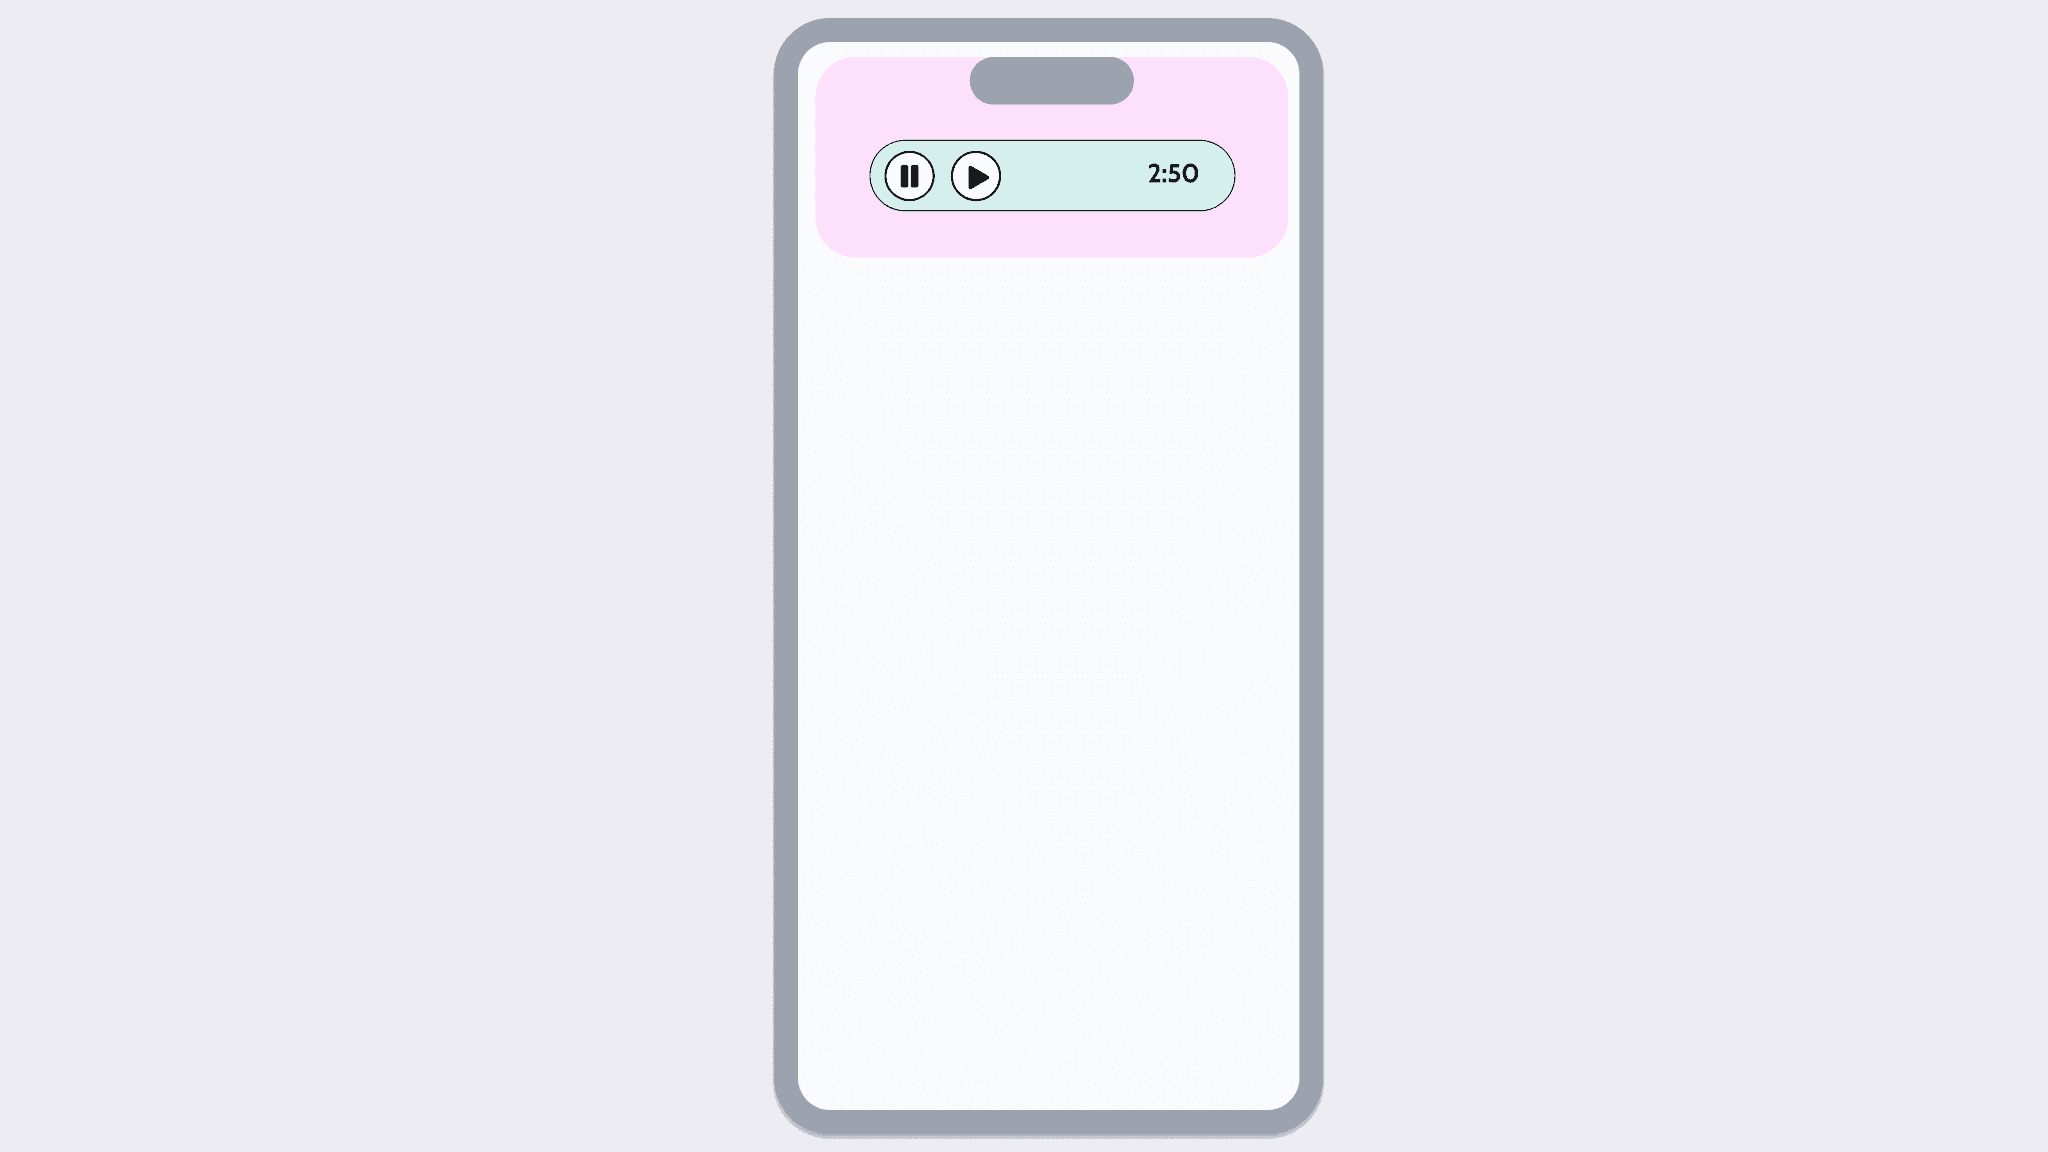
}Fantastic! The new pause functionality is now seamlessly integrated into the app, as demonstrated in the video below.
Eager to see how your progress stacks up? You're welcome to compare your work with the example repository.
Simply visit the step/pause_app_unsynced branch to align your project with this stage of development.
Expanding the Native Module's Capabilities
Currently, your Native Module remains oblivious to the new pause feature. As a result, the timer in the Live Activity continues to tick away relentlessly until it's explicitly stopped. It's time to upgrade the Native Module's API to embrace the pause functionality within the Live Activity.
The process starts when the app captures the timestamp at the exact moment the timer is paused. This specific timestamp is what we need to communicate to the iOS side.
Let's introduce two new methods to the Native Module API that will encapsulate the new functionality: pause and resume.
Your first step is to open the TimerWidgetBridge.m file. Here, you'll add these methods and ensure they're accessible via the React Native bridge.
// TimerWidgetBridge.m
#import <React/RCTBridgeModule.h>
@interface RCT_EXTERN_MODULE(TimerWidgetModule, NSObject)
+ (bool)requiresMainQueueSetup {
return NO;
}
RCT_EXTERN_METHOD(startLiveActivity:(nonnull double *)timestamp)
RCT_EXTERN_METHOD(pause:(nonnull double *)timestamp)RCT_EXTERN_METHOD(resume)RCT_EXTERN_METHOD(stopLiveActivity)
@endUpdating the Data Model
Introducing a pause feature adds a new layer to the application state, which the Live Activity needs to recognize.
Remember that, for configuring the dynamic content of the Live Activity, you created a struct conforming to the ActivityAttributes protocol
called TimerWidgetAttributes.
So far, this struct has had just one dynamic property, startedAt. Now, let's enhance it by adding a second property named pausedAt
to keep track of when the timer is paused. Like startedAt, pausedAt will also be of type Date.
While the OS natively calculates the time elapsed when the timer is running (thanks to the .timer style of the Date object),
pausing the timer requires a different approach. There aren't native methods to directly pause or resume the timer.
Consequently, you need to manually calculate the time during a paused state.
To assist with this, a function named getPausedTime is introduced. This function is designed to return a formatted string representing the paused time.
This string will then be used to update the Text content in the Live Activity whenever the timer is paused.
// TimerWidgetLiveActivity
import ActivityKit
import WidgetKit
import SwiftUI
struct TimerWidgetAttributes: ActivityAttributes {
public struct ContentState: Codable, Hashable {
// Dynamic stateful properties about your activity go here!
// Unix timestamp in seconds
var startedAt: Date?
var pausedAt: Date?
func getElapsedTimeInSeconds() -> Int { let now = Date() guard let startedAt = self.startedAt else { return 0 } guard let pausedAt = self.pausedAt else { return Int(now.timeIntervalSince1970 - startedAt.timeIntervalSince1970) } return Int(pausedAt.timeIntervalSince1970 - startedAt.timeIntervalSince1970) }
func getPausedTime() -> String { let elapsedTimeInSeconds = getElapsedTimeInSeconds() let minutes = (elapsedTimeInSeconds % 3600) / 60 let seconds = elapsedTimeInSeconds % 60 return String(format: "%d:%02d", minutes, seconds) }
func getTimeIntervalSinceNow() -> Double {
guard let startedAt = self.startedAt else {
return 0
}
return startedAt.timeIntervalSince1970 - Date().timeIntervalSince1970
}
func isRunning() -> Bool {
return pausedAt == nil
}
}
}SwiftUI View Builders Conditionals
With the data model now pause-aware, the view layer gains the flexibility to conditionally render distinct Text nodes
based on the timer's current state. Swift UI's View Builders are adept at handling such conditionals,
allowing you to seamlessly integrate if/else statements to dictate the content displayed.
The isRunning utility function, which is part of the Activity Attributes, allows you to govern the rendering of the Dynamic Island in its Expanded mode.
This conditional logic isn't limited to just one presentation mode. You can apply the same principle to other modes of the Live Activity, such as Compact and on the Lock Screen.
DynamicIslandExpandedRegion(.center) {
if (context.state.isRunning()) {
Text(
Date(timeIntervalSinceNow: context.state.getTimeIntervalSinceNow()),
style: .timer
)
.font(.title)
.foregroundColor(.cyan)
.fontWeight(.medium)
.monospacedDigit()
} else {
Text(
context.state.getPausedTime()
)
.font(.title)
.foregroundColor(.cyan)
.fontWeight(.medium)
.monospacedDigit()
.transition(.identity)
}
}Pause and Resume Methods
The TimerWidgetModule class functions manage the timer's state in Swift. Until now, it's been tracking the startedAt date.
It's time to expand this functionality by introducing a new property, pausedAt, which, like startedAt, will be of type Date.
Furthermore, I'm adding a reference to the live activity through the currentActivity property.
This addition allows for updating the live activity's content directly from different class methods.
To bring it all together, the pause and resume methods will take charge of updating the live activity, making use of both startedAt and pausedAt values.
By doing so, they ensure that the live activity accurately reflects the timer's current state, whether it's paused or resumed.
// TimerWidgetModule.swift
import Foundation
import ActivityKit
@objc(TimerWidgetModule)
class TimerWidgetModule: NSObject {
private var currentActivity: Activity<TimerWidgetAttributes>? private var startedAt: Date? private var pausedAt: Date?
// No changes here
private func areActivitiesEnabled() -> Bool {}
// No changes here
@objc
func startLiveActivity(_ timestamp: Double) -> Void {}
@objc
func stopLiveActivity() -> Void {
resetValues() Task {
for activity in Activity<TimerWidgetAttributes>.activities {
await activity.end(nil, dismissalPolicy: .immediate)
}
}
}
private func resetValues() { startedAt = nil pausedAt = nil currentActivity = nil }
@objc func pause(_ timestamp: Double) -> Void { pausedAt = Date(timeIntervalSince1970: timestamp) let contentState = TimerWidgetAttributes.ContentState(startedAt: startedAt, pausedAt: pausedAt) Task { await currentActivity?.update( ActivityContent<TimerWidgetAttributes.ContentState>( state: contentState, staleDate: nil ) ) } }
@objc func resume() -> Void { guard let startDate = self.startedAt else { return } guard let pauseDate = self.pausedAt else { return } let elapsedSincePaused = Date().timeIntervalSince1970 - pauseDate.timeIntervalSince1970 startedAt = Date(timeIntervalSince1970: startDate.timeIntervalSince1970 + elapsedSincePaused) pausedAt = nil let contentState = TimerWidgetAttributes.ContentState(startedAt: startedAt, pausedAt: nil) Task { await currentActivity?.update( ActivityContent<TimerWidgetAttributes.ContentState>( state: contentState, staleDate: nil ) ) } }}Integrating New Methods into JavaScript
The final step in the journey is to integrate the newly added pause and resume methods into the JavaScript layer.
This integration happens within the useTimer hook. Here's how it's done:
// useTimer.ts
import React from 'react';
import {NativeModules} from 'react-native';
const {TimerWidgetModule} = NativeModules;
const useTimer = () => {
const [elapsedTimeInMs, setElapsedTimeInMs] = React.useState(0);
const [isPlaying, setIsPlaying] = React.useState(false);
const startTime = React.useRef<number | null>(null);
const pausedTime = React.useRef<number | null>(null);
const intervalId = React.useRef<NodeJS.Timeout | null>(null);
// Other variables...
function play() {
setIsPlaying(true);
// Already playing, returning early
if (intervalId.current) {
return;
}
// First time playing, recording the start time
if (!startTime.current) {
startTime.current = Date.now();
}
if (pausedTime.current) {
// If the timer is paused, we need to update the start time
const elapsedSincePaused = Date.now() - pausedTime.current;
startTime.current = startTime.current! + elapsedSincePaused;
pausedTime.current = null;
TimerWidgetModule.resume(); } else {
TimerWidgetModule.startLiveActivity(startTime.current / 1000); }
intervalId.current = setInterval(() => {
setElapsedTimeInMs(Date.now() - startTime.current!);
}, 32);
}
function pause() {
setIsPlaying(false);
removeInterval();
if (startTime.current && !pausedTime.current) {
pausedTime.current = Date.now();
TimerWidgetModule.pause(pausedTime.current / 1000); setElapsedTimeInMs(pausedTime.current! - startTime.current!);
}
}
function reset() {
setIsPlaying(false);
removeInterval();
startTime.current = null;
pausedTime.current = null;
setElapsedTimeInMs(0);
TimerWidgetModule.stopLiveActivity(); }
function removeInterval() {
if (intervalId.current) {
clearInterval(intervalId.current);
intervalId.current = null;
}
}
}Awesome! Let's fire up the app once more to see those fancy new pausing capabilities in action!
Nice job! The app is shaping up quite impressively.
Want to compare your version with mine? Feel free to check out the step/pause_app_synced branch for a detailed comparison.
Even though having pause/resume controls within the app is great, imagine the convenience of controlling the timer directly from the Live Activity.
That's exactly where you're heading next. It's time to brush up on your Swift UI skills and dive into Live Activity Interactions.
Live Activity Interactions
Starting with iOS 17.0, Apple introduced a game-changing feature: interactive Live Activities. This significant enhancement transforms the way users engage with their iPhones, making real-time interactions more dynamic and intuitive.
Throughout Buttons and Toggles, developers can offer specific app functionality without launching the app by adopting the App Intents framework.
For a timer application like yours, this is particularly beneficial. You're going to implement a couple of buttons within the Live Activity. These buttons will provide pause and reset functionalities when the Live Activity is in its Expanded Presentation mode.
Remember, to switch to Expanded Presentation, simply touch and hold the Live Activity when it's in either Compact or Minimal presentation mode.
App Intents
App Intents, a key feature in the Swift programming language and iOS framework, are designed to streamline the creation and management of shortcuts and automations. Debuted in iOS 16, App Intents empower developers to programmatically extend their app's functionalities to various iOS system components. These include Live Activities, Siri, and the Shortcuts app.
Each interaction within a Live Activity corresponds to a LiveActivityIntent, which is a protocol expanding upon AppIntent.
Your first task is to define the three potential user actions within the Live Activity: resume, pause, and stop.
Start by creating a new Swift file named TimerWidgetLiveActivityIntent.swift. This file will serve as the hub for all App Intents.
Initially, these intents will act as placeholders. Ensure that this file is included in the main application target, rather than the Widget Extension.
Adhering to the LiveActivityIntent protocol requires providing a title and implementing a perform function.
The perform function dictates the app's response to specific interactions, such as button presses or toggle switches.
It should return an IntentResult. An example is the output from the Swift-defined function .result(), signaling the completion of the AppIntent execution.
// TimerWidgetLiveActivityIntent.swift
import Foundation
import AppIntents
public struct PauseIntent: LiveActivityIntent {
public init() {}
public static var title: LocalizedStringResource = "Pause timer"
public func perform() async throws -> some IntentResult {
return .result()
}
}
public struct ResumeIntent: LiveActivityIntent {
public init() {}
public static var title: LocalizedStringResource = "Resume timer"
public func perform() async throws -> some IntentResult {
return .result()
}
}
public struct ResetIntent: LiveActivityIntent {
public init() {}
public static var title: LocalizedStringResource = "Reset timer"
public func perform() async throws -> some IntentResult {
// TimerEventEmitter.emitter?.sendEvent(withName: "onReset", body: nil)
return .result()
}
}Designing Buttons in SwiftUI for Expanded Presentation Mode
Up to this point, the Expanded presentation mode in our app has primarily featured a left-aligned timer count display. Now, it's time to infuse some interactivity into this space, particularly within the Dynamic Island's Expanded Region.
The following code snippet showcases one of the many ways to enliven this area. I'll be introducing a layout that places a couple of icon buttons on the left, with the timer displayed on the right. All these elements are neatly encapsulated within a rounded rectangle.
Pay close attention to how the interaction is established. This is achieved through the Button's intent property.
Here, the Live Activity Intent is instantiated, as seen in Button(intent: ResumeIntent()) {...}.
// TimerWidgetLiveActivity.swift
DynamicIslandExpandedRegion(.center) {
ZStack {
RoundedRectangle(cornerRadius: 24).strokeBorder(Color(red: 148/255.0, green: 163/255.0, blue: 184/255.0), lineWidth: 2)
HStack {
HStack(spacing: 8.0, content: {
if (context.state.isRunning()) {
Button(intent: PauseIntent()) {
ZStack {
Circle().fill(Color.cyan.opacity(0.5))
Image(systemName: "pause.fill")
.imageScale(.large)
.foregroundColor(.cyan)
}
}
.buttonStyle(PlainButtonStyle()) // Removes default button styling
.contentShape(Rectangle()) // Ensures the tap area includes the entire custom content
} else {
Button(intent: ResumeIntent()) {
ZStack {
Circle().fill(Color.cyan.opacity(0.5))
Image(systemName: "play.fill")
.imageScale(.large)
.foregroundColor(.cyan)
}
}
.buttonStyle(PlainButtonStyle()) // Removes default button styling
.contentShape(Rectangle()) // Ensures the tap area includes the entire custom content
}
Button(intent: ResetIntent()) {
ZStack {
Circle().fill(.gray.opacity(0.5))
Image(systemName: "xmark")
.imageScale(.medium)
.foregroundColor(.white)
}
}
.buttonStyle(PlainButtonStyle()) // Removes default button styling
.contentShape(Rectangle()) // Ensures the tap area includes the entire custom content
Spacer()
})
if (!context.state.isRunning()) {
Text(
context.state.getPausedTime()
)
.font(.title)
.foregroundColor(.cyan)
.fontWeight(.medium)
.monospacedDigit()
.transition(.identity)
} else {
Text(
Date(
timeIntervalSinceNow: context.state.getTimeIntervalSinceNow()
),
style: .timer
)
.font(.title)
.foregroundColor(.cyan)
.fontWeight(.medium)
.monospacedDigit()
.frame(width: 60)
.transition(.identity)
}
}
.padding()
}
.padding()
}Awesome! Time to launch the app and check out your enhanced UI.
But hold on, did you encounter some hiccups with Xcode? If you're seeing errors like the ones in the screenshot below, don't worry – it's all part of the process.
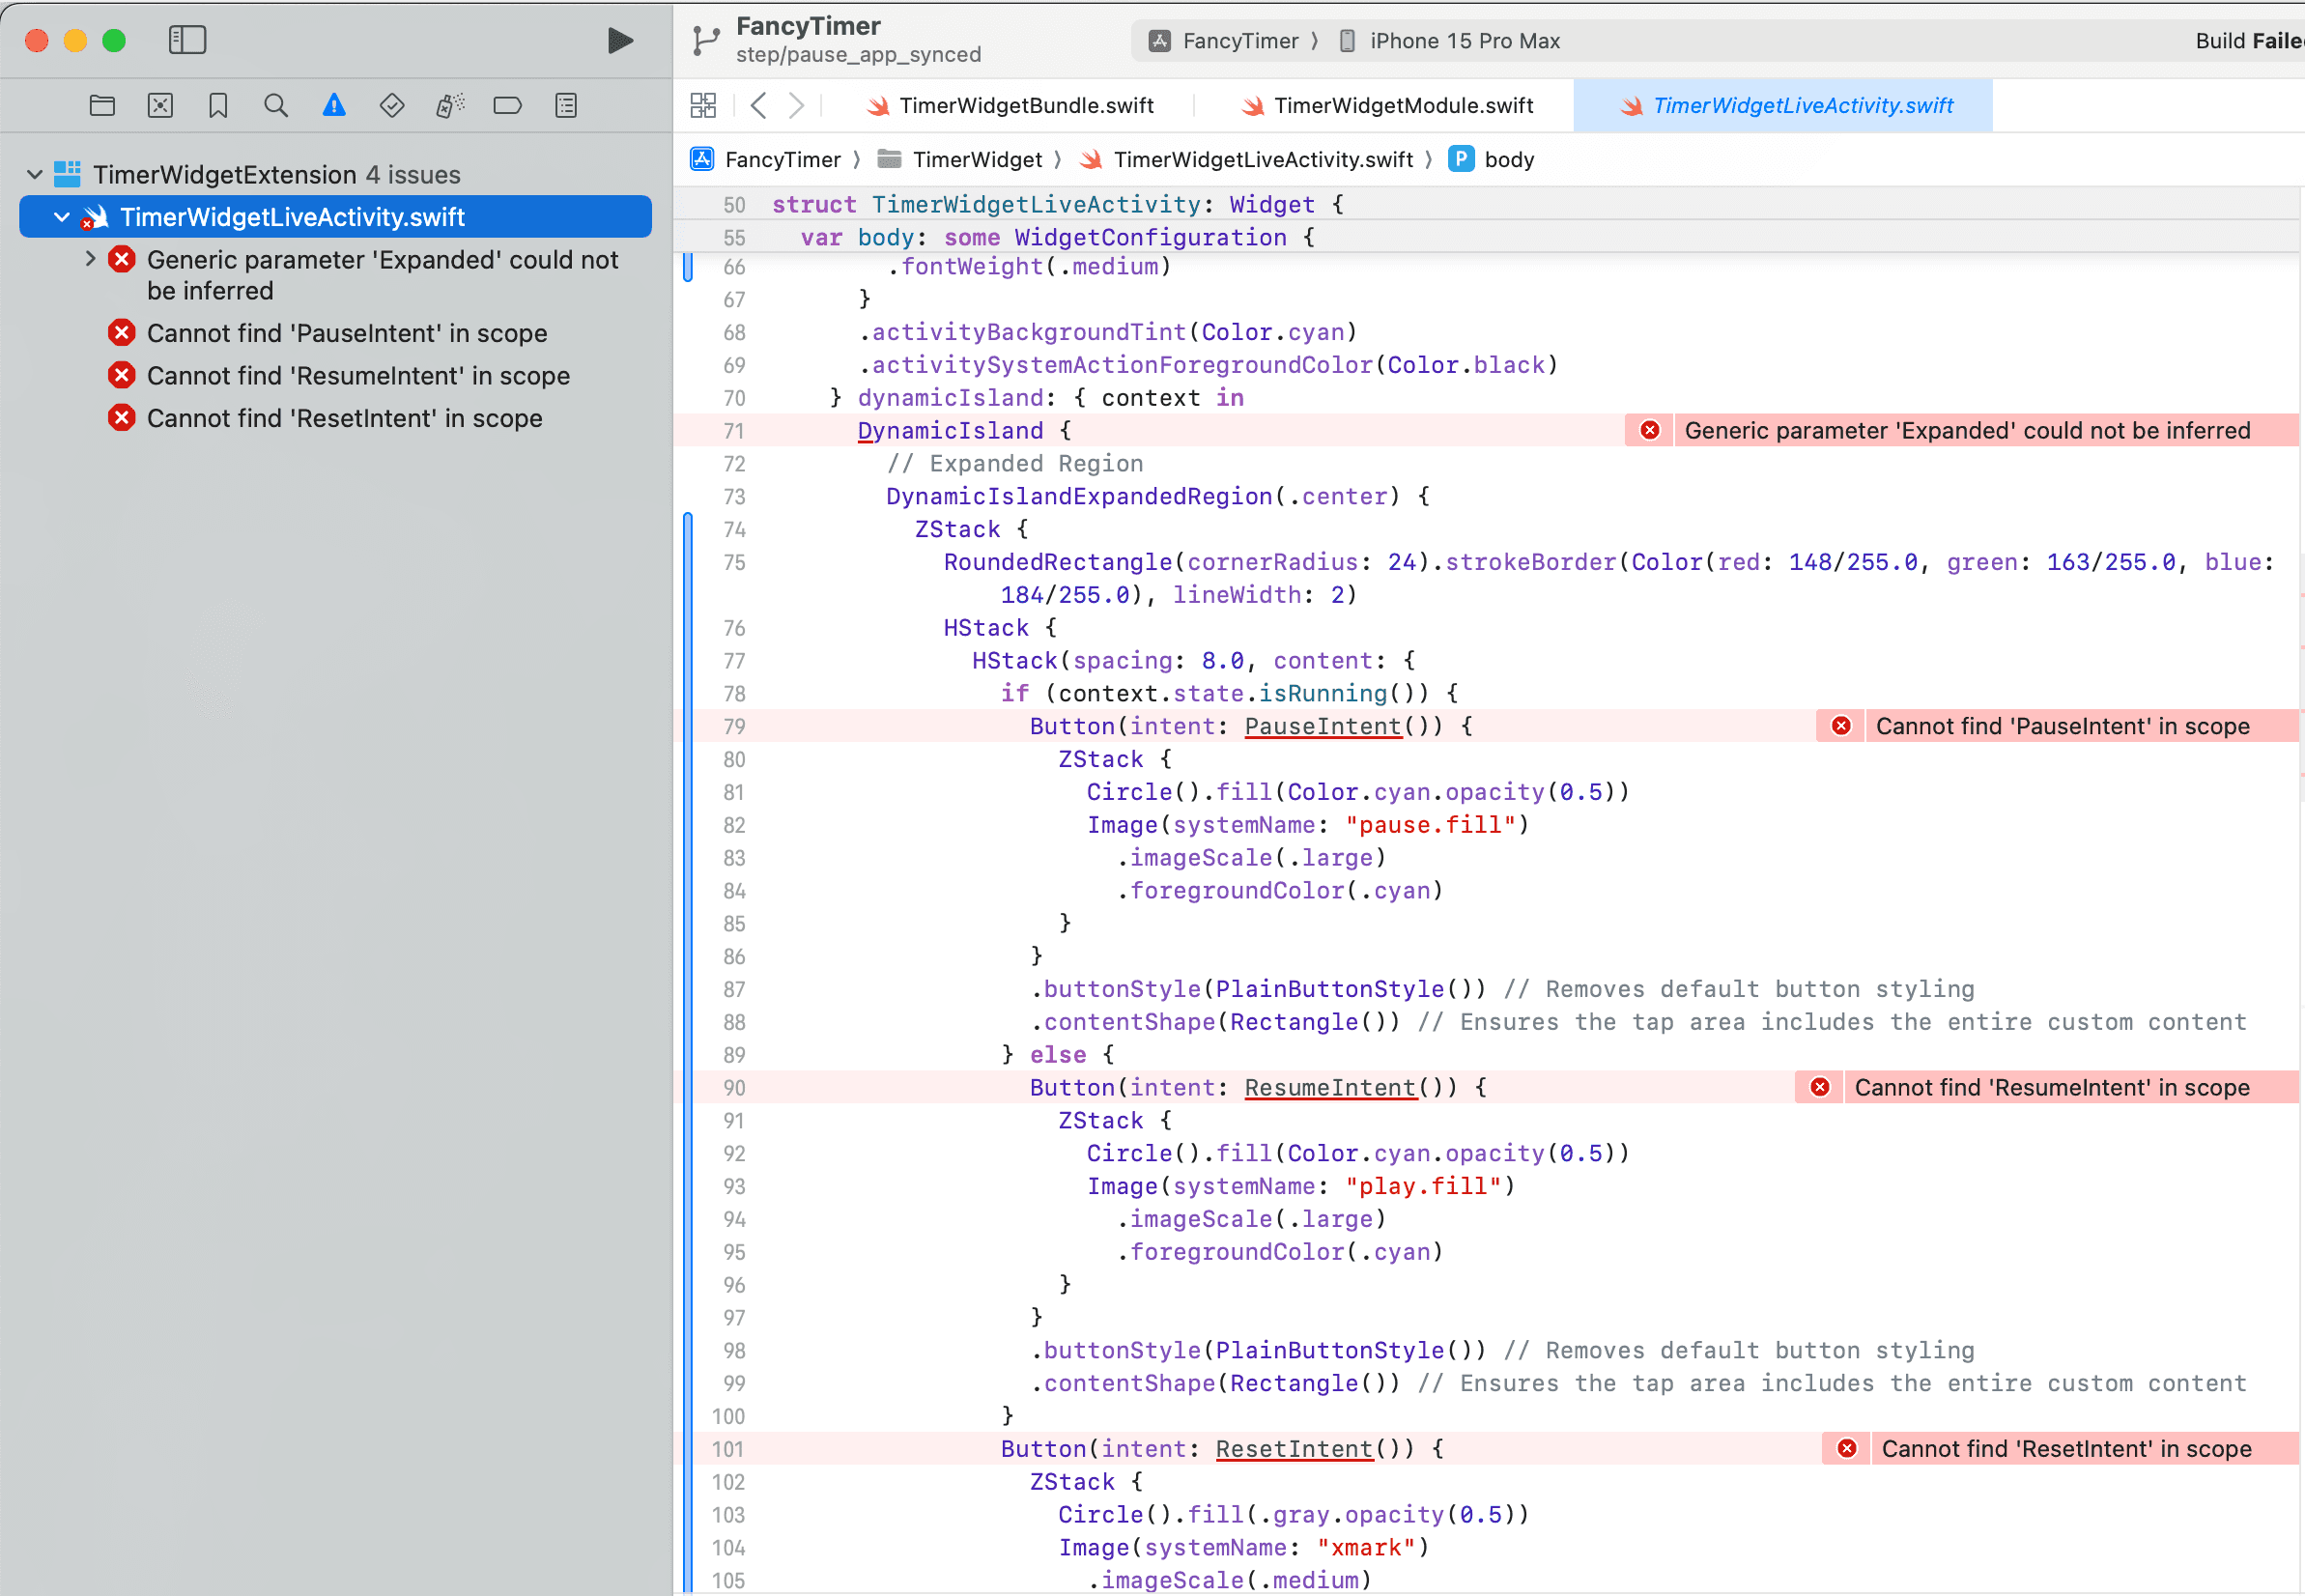
Here's what's happening: The TimerWidgetLiveActivity.swift file, which is the core of the Live Activity, is included in both the application and widget extension targets.
However, the widget extension doesn't have access to the intents because they are only added to the app target.
This scenario poses a dilemma. The intents are crucial as they will soon incorporate code to interact with the React Native realm. But there's a catch – the widget extension cannot access the React context. This raises an important question: How do we satisfy both requirements?
Resolving Xcode Issues with an Intent Placeholder
There's a neat trick to get back on track.
The solution lies in creating a separate file that mirrors the intents declared in the TimerWidgetLiveActivityIntent.swift file,
but this new file is exclusively added to the widget extension targets.
You can name this file IntentPlaceholder.swift. Its role is crucial yet straightforward: it serves as a blueprint.
This means it will replicate the structure of TimerWidgetLiveActivityIntent.swift but won't delve into any implementation specifics.
App Intents are always executed on the app context, so this is just a way to make the compiler happy.
For the moment, this placeholder file will be an exact duplicate of TimerWidgetLiveActivityIntent.swift.
// IntentPlaceholder.swift
public struct PauseIntent: LiveActivityIntent {
public init() {}
public static var title: LocalizedStringResource = "Pause timer"
public func perform() async throws -> some IntentResult {
return .result()
}
}
public struct ResumeIntent: LiveActivityIntent {
public init() {}
public static var title: LocalizedStringResource = "Resume timer"
public func perform() async throws -> some IntentResult {
return .result()
}
}
public struct ResetIntent: LiveActivityIntent {
public init() {}
public static var title: LocalizedStringResource = "Reset timer"
public func perform() async throws -> some IntentResult {
return .result()
}
}Now, with the IntentPlaceholder.swift in place, Xcode should be all set and ready to go.
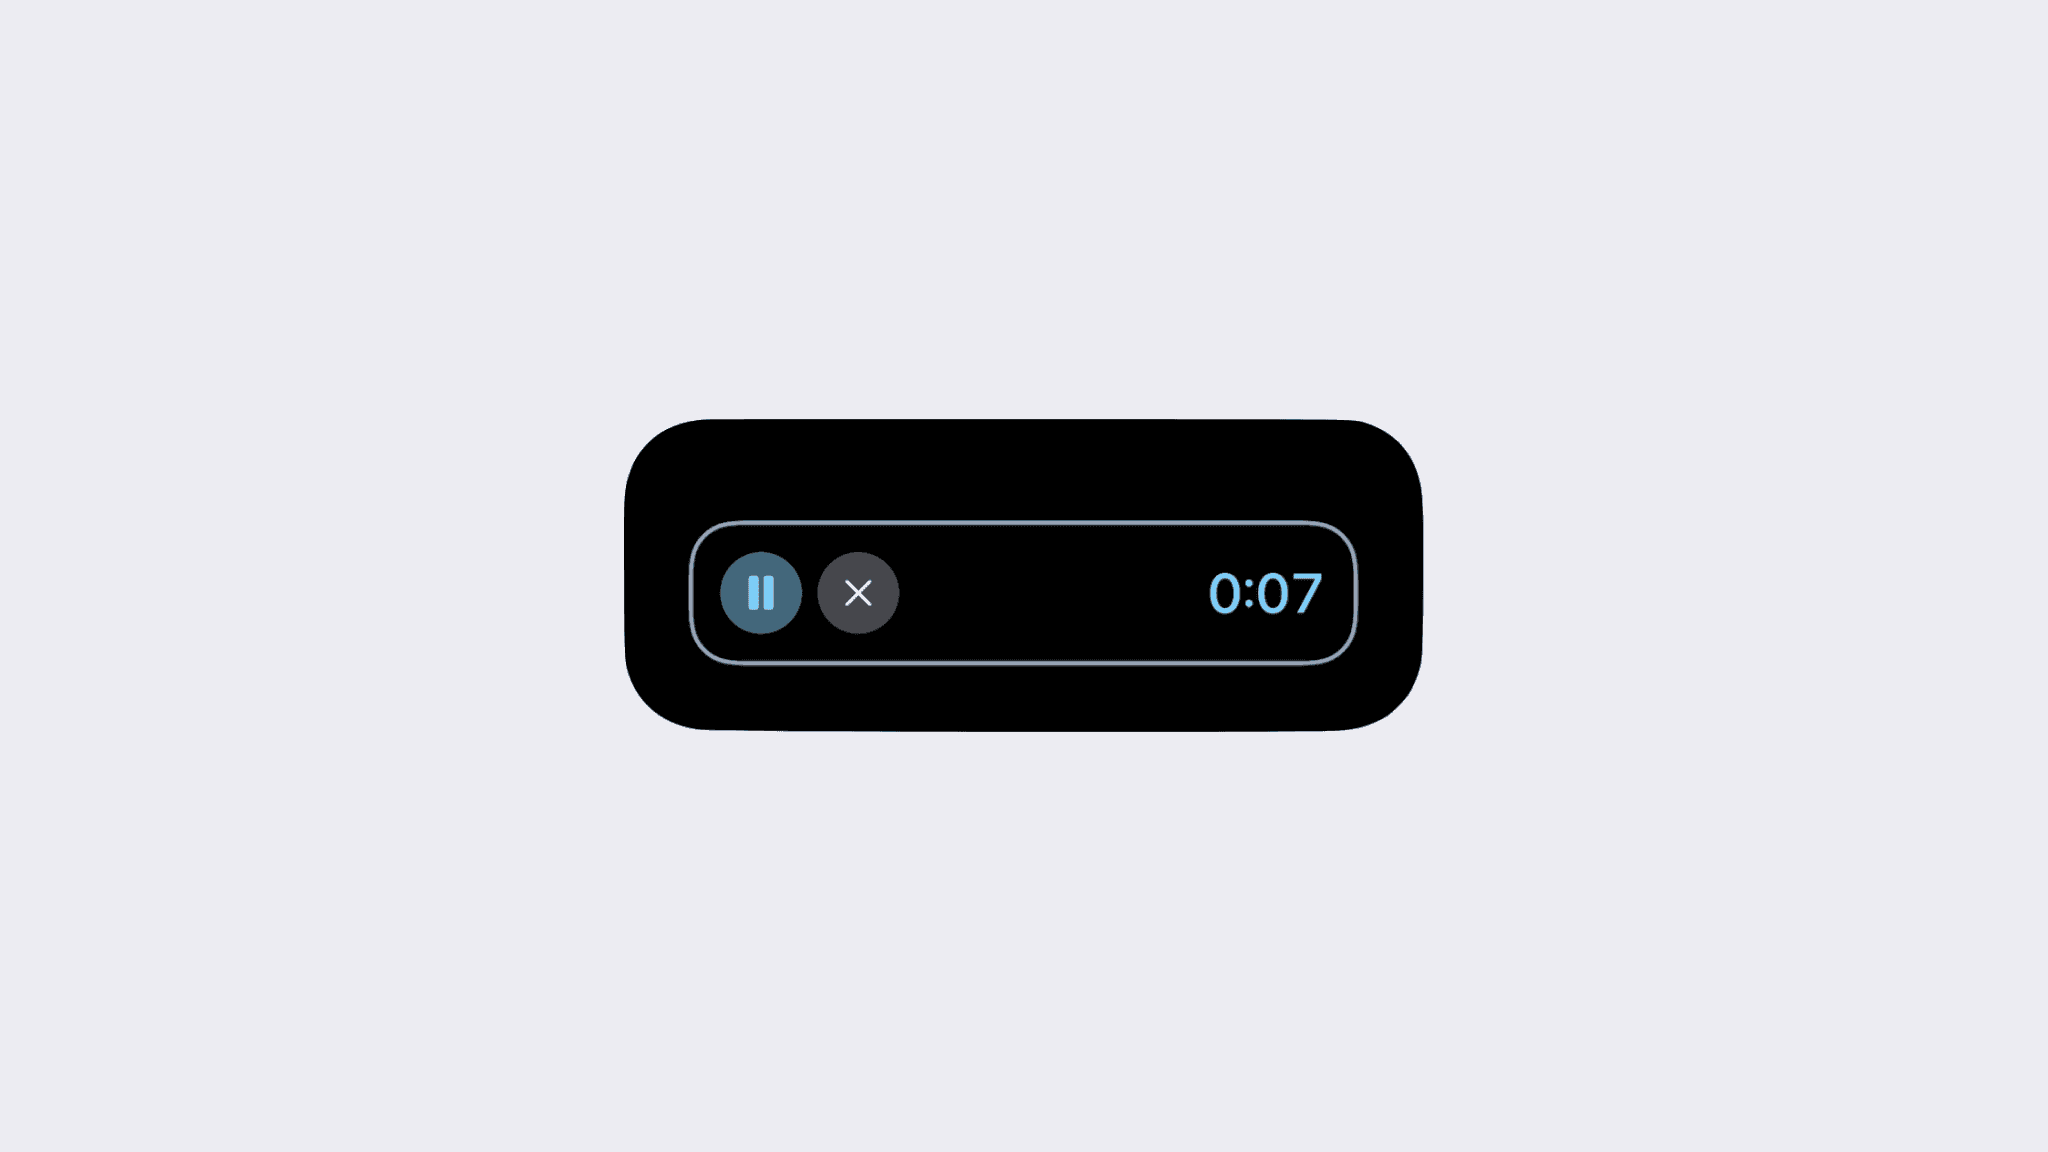
It's time to hit that "Play" button! Once the application is running, simply background it and then long press the compact mode to switch to Expanded view.
Prepare to be impressed – your Live Activity will now display a sleek, modern design, edging ever closer to being release-ready 😎
To ensure you're on track, feel free to compare your progress with the corresponding branch in the repository.
Here's the link to the step/expanded_design
branch where you can cross-check your work.
Implementing Pause/Resume Functionality in the Live Activity
The buttons on your Live Activity now look fantastic, but they don't do anything when pressed yet.
At first, it might seem straightforward to directly call your Native Module methods from the Live Activity Intents. Sure, this approach would work fine within the Live Activity, but there's a snag: the React Native application remains oblivious to these actions triggered in the Live Activity.
Throughout this article series, you've been adeptly creating pathways for communication from JS to Native. But now, a new question arises: How do you establish a similar flow of communication in reverse, specifically when native code needs to send information back to the JS realm?
This is the million-dollar question that sets the stage for the last crucial step.
Utilizing RCTEventEmitter for Bidirectional Communication
Native Modules have the capability to signal events to JavaScript using an event emitter mechanism. This is crucial for establishing the two-way communication we need.
Setting up this mechanism involves two primary steps:
- Create a Subclass of
RCTEventEmitter: Implement thesupportedEventsmethod and useself.sendEventWithNameto emit events. - Subscribe to These Events in JavaScript: This is done by creating a new
NativeEventEmitterinstance around your module.
First things first, let's tackle step one. Your task is to create a new native module dedicated to sending events. This involves crafting both a bridge file and an implementation file. Remember, these should be incorporated exclusively into the application target.
// TimerEventEmitter.m
#import <Foundation/Foundation.h>
#import <React/RCTBridgeModule.h>
#import <React/RCTEventEmitter.h>
@interface RCT_EXTERN_MODULE(TimerEventEmitter, RCTEventEmitter)
+ (bool)requiresMainQueueSetup {
return NO;
}
RCT_EXTERN_METHOD(supportedEvents)
@endThe supportedEvents method plays a pivotal role in this setup, as it needs to be exported to JavaScript.
This export is crucial because it enables React Native to recognize and register the events your module will emit.
// TimerEventEmitter.swift
import Foundation
@objc(TimerEventEmitter)
class TimerEventEmitter: RCTEventEmitter {
public static var emitter: TimerEventEmitter?
override init() {
super.init()
TimerEventEmitter.emitter = self
}
override func supportedEvents() -> [String]! {
return ["onPause", "onResume", "onReset"]
}
}This code defines a TimerEventEmitter class that is an extension of React Native's event emitter system.
It's designed to handle specific events (onPause, onResume, and onReset) that can be emitted from the native (Swift) side
of a React Native application and caught in the JavaScript side. The use of a static variable for the emitter
allows for easy access to its singleton instance from other parts of the Swift code.
To make the RCTEventEmitter class available in Swift, you have to import the appropriate header into your Swift project's bridging header file.
// FancyTimer-Bridging-Header.h
// Use this file to import your target's public headers that you would like to expose to Swift
#import <React/RCTEventEmitter.h>#import <React/RCTBridgeModule.h>Now that the RCTEventEmitter class is successfully integrated into your Swift project,
you're all set to leverage it within your Live Activity Intents.
By utilizing the TimerEventEmitter class in your Live Activity Intents, you can trigger the onPause, onResume, and
onReset events. Once emitted, can be caught and handled on the JavaScript side.
// TimerWidgetLiveActivityIntent.swift
import Foundation
import AppIntents
public struct PauseIntent: LiveActivityIntent {
public init() {}
public static var title: LocalizedStringResource = "Pause timer"
public func perform() async throws -> some IntentResult {
TimerEventEmitter.emitter?.sendEvent(withName: "onPause", body: nil) return .result()
}
}
public struct ResumeIntent: LiveActivityIntent {
public init() {}
public static var title: LocalizedStringResource = "Resume timer"
public func perform() async throws -> some IntentResult {
TimerEventEmitter.emitter?.sendEvent(withName: "onResume", body: nil) return .result()
}
}
public struct ResetIntent: LiveActivityIntent {
public init() {}
public static var title: LocalizedStringResource = "Reset timer"
public func perform() async throws -> some IntentResult {
TimerEventEmitter.emitter?.sendEvent(withName: "onReset", body: nil) return .result()
}
}Subscribing to Native Events in JavaScript
Get ready for a burst of excitement, because you are one step away from completing all the Live Activity functionalities!
Your final move involves tweaking the useTimer hook in your JavaScript code, to listen for the events emitted by the native side.
- Create a new instance of
NativeEventEmitter, linking it to your custom native module. - Implement a
useEffecthook to manage the subscription and unsubscription to the native events emitted by your Swift code.
By subscribing to these events, your JavaScript code can react (no pun intended) to changes or actions that occur in the native layer,
hence calling the appropriate functions in the useTimer hook.
Here's a brief outline of what this might look like in your code:
// useTimer.ts
import React, {useCallback, useEffect} from 'react';
import {NativeEventEmitter, NativeModule, NativeModules} from 'react-native';
const {TimerWidgetModule} = NativeModules;
const TimerEventEmitter = new NativeEventEmitter( NativeModules.TimerEventEmitter as NativeModule,);
const useTimer = () => {
const [elapsedTimeInMs, setElapsedTimeInMs] = React.useState(0);
const [isPlaying, setIsPlaying] = React.useState(false);
const startTime = React.useRef<number | null>(null);
const pausedTime = React.useRef<number | null>(null);
const intervalId = React.useRef<NodeJS.Timeout | null>(null);
const elapsedTimeInSeconds = Math.floor(elapsedTimeInMs / 1000);
const secondUnits = elapsedTimeInSeconds % 10;
const secondTens = Math.floor(elapsedTimeInSeconds / 10) % 6;
const minutes = Math.floor(elapsedTimeInSeconds / 60);
const value = `${minutes}:${secondTens}${secondUnits}`;
const play = useCallback(() => {
setIsPlaying(true);
// Already playing, returning early
if (intervalId.current) {
return;
}
// First time playing, recording the start time
if (!startTime.current) {
startTime.current = Date.now();
}
if (pausedTime.current) {
// If the timer is paused, we need to update the start time
const elapsedSincePaused = Date.now() - pausedTime.current;
startTime.current = startTime.current! + elapsedSincePaused;
pausedTime.current = null;
TimerWidgetModule.resume();
} else {
TimerWidgetModule.startLiveActivity(startTime.current / 1000);
}
intervalId.current = setInterval(() => {
setElapsedTimeInMs(Date.now() - startTime.current!);
}, 32);
}, []);
const pause = useCallback(() => {
setIsPlaying(false);
removeInterval();
if (startTime.current && !pausedTime.current) {
pausedTime.current = Date.now();
TimerWidgetModule.pause(pausedTime.current / 1000);
setElapsedTimeInMs(pausedTime.current! - startTime.current!);
}
}, []);
const reset = useCallback(() => {
setIsPlaying(false);
removeInterval();
startTime.current = null;
pausedTime.current = null;
setElapsedTimeInMs(0);
TimerWidgetModule.stopLiveActivity();
}, []);
useEffect(() => { const pauseSubscription = TimerEventEmitter.addListener('onPause', pause); const resumeSubscription = TimerEventEmitter.addListener('onResume', play); const resetSubscription = TimerEventEmitter.addListener('onReset', reset); return () => { pauseSubscription.remove(); resumeSubscription.remove(); resetSubscription.remove(); }; }, [pause, reset, play]);
function removeInterval() {
if (intervalId.current) {
clearInterval(intervalId.current);
intervalId.current = null;
}
}
return {
play,
pause,
reset,
value,
isPlaying,
};
};
export default useTimer;And voilà! Your masterpiece is now complete.
To see everything come together and explore the complete solution, head over to the main branch
of the example repository.
Conclusion
Wow, what a journey! If you've been with me all the way through to this point, you're nothing short of a superhero. This series of articles has indeed been a long haul, but I truly hope it's been as enjoyable and enriching for you as it has been for me.
Let's recap what you've mastered:
- Creating a Live Activity from scratch.
- Getting familiar with SwiftUI and WidgetKit.
- Integrating Live Activities with React Native.
- Developing a timer that maintains synchronicity between the app and the Live Activity.
- Implementing pause/resume functions.
- Adding interactive buttons to the Live Activity for timer control.
- Navigating the complexities of communication between the Live Activity and the React Native app.
With these skills in your arsenal, you're well-equipped to start designing and implementing your own Live Activities. Need a spark of creativity? Dive into the ActivityKit documentation for a wealth of ideas and possibilities.
Happy coding! 🚀

